
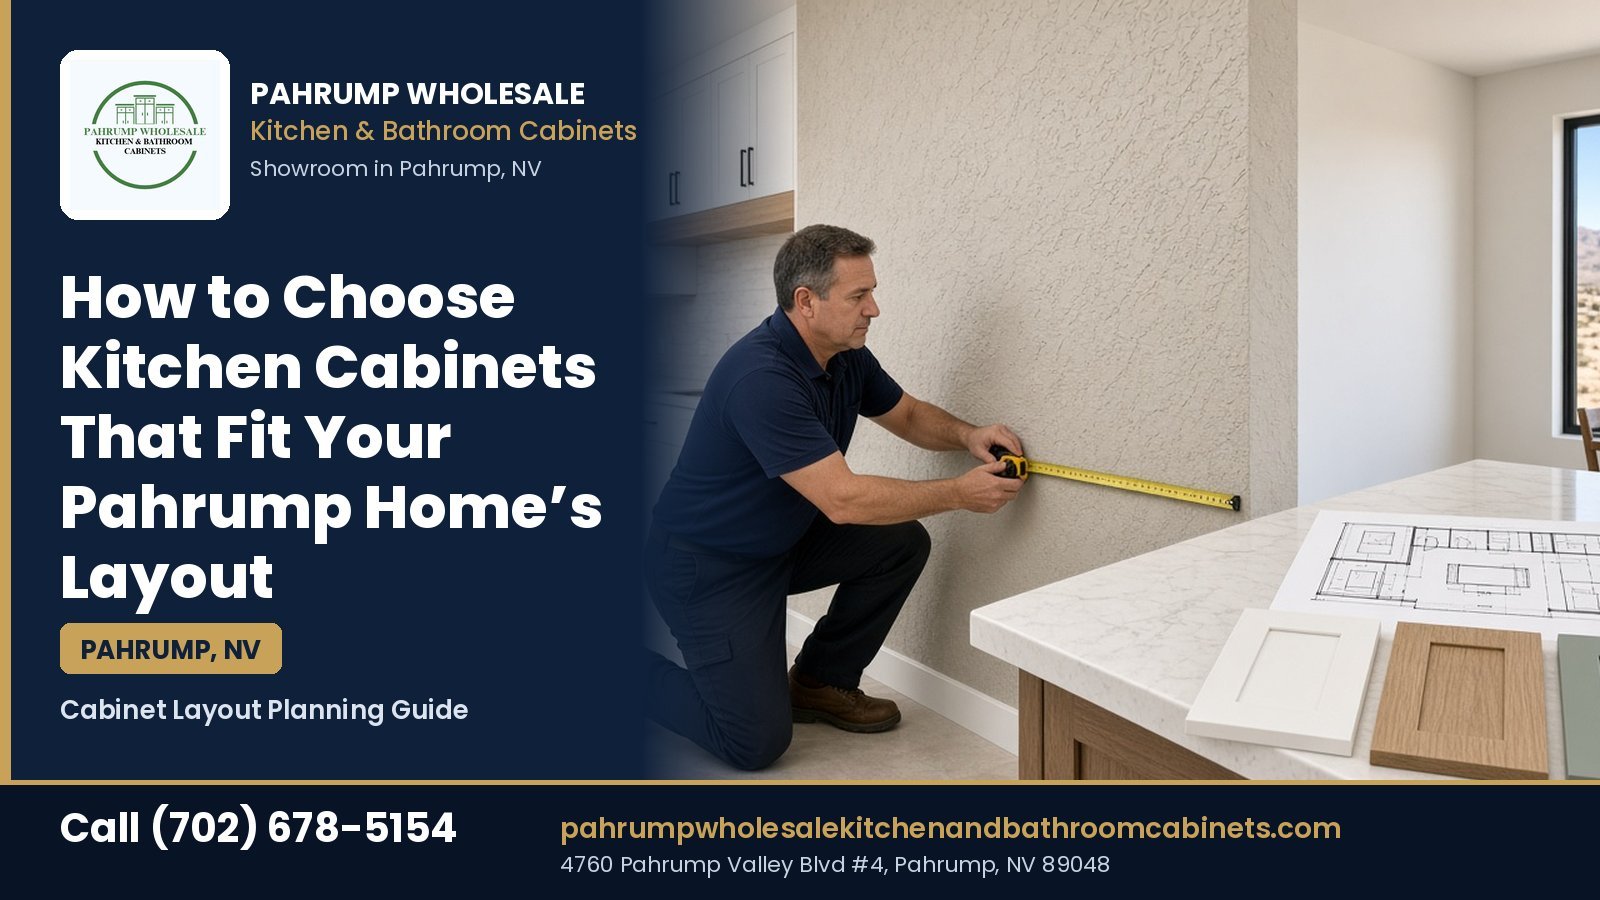
Pahrump Wholesale Kitchen and Bathroom Cabinets · Cabinet Layout Planning Guide
How to Choose Kitchen Cabinets That Fit Your Pahrump Home’s Layout
Cabinets that look perfect in a showroom can still be wrong for your kitchen if they block a window, crowd a walkway, or leave a dishwasher door that cannot open. In Pahrump, kitchens come in every shape, from compact galley rooms in manufactured homes to wide open plans in newer site-built houses on larger lots. The way to get cabinets that fit is to plan around the room you have, not the room in a catalog photo. This kitchen cabinet layout Pahrump guide walks you through it step by step. You will learn how to measure walls, windows, and openings, how the common kitchen shapes work, how standard cabinet sizes add up along a wall, where fillers and panels belong, how to plan clearances and work zones, how to fit appliances, how to handle corners and islands, and what changes in manufactured homes and older houses. You will also get a checklist of what to bring when you are ready to talk about a layout. Visit Pahrump Wholesale Kitchen and Bathroom Cabinets at 4760 Pahrump Valley Blvd #4, Pahrump, NV 89048, or call (702) 678-5154.
How do you choose kitchen cabinets that fit your Pahrump home’s layout?
Measure every wall, window, door, and utility location first, then pick the kitchen shape that suits your room and traffic, and build the cabinet run from standard widths plus fillers so doors, drawers, and appliances all open freely. Plan aisles and work zones before you choose door styles, and confirm the final layout with real measurements before you order.
This page shares general planning guidance and educational ranges based on typical residential work, not a price list and not a quote from Pahrump Wholesale Kitchen and Bathroom Cabinets. Cabinet sizes, lines, and options vary by manufacturer and change over time, so always confirm what is currently available before you lock in a design.
Local context: Pahrump Wholesale Kitchen and Bathroom Cabinets sells kitchen and bathroom cabinets to homeowners across Pahrump and Nye County. Bring your measurements and photos, call (702) 678-5154, or find the showroom on Google Maps and ask which cabinet sizes and options are available right now.
Start With the Room, Not the Catalog
Quick answer: Before you look at door styles or colors, write down what in your kitchen cannot move or is expensive to move: windows, doors, the sink drain, the gas or electric range hookup, the vent, and load-bearing walls. Those fixed points decide where cabinets can go. Style choices come after the layout works on paper.
Most kitchen layout problems start with a shopping trip. Someone sees a beautiful run of tall pantry cabinets or a large island in a showroom, falls in love with it, and tries to fit that picture into a kitchen that was never shaped for it. The result is a pantry that blocks half a window, an island that leaves a walkway too narrow for two people, or a corner where two drawers crash into each other. A better approach is to treat the room itself as the first piece of the design. Everything else gets measured against it.
Start by walking through your kitchen with a notepad and listing every fixed element. A window is fixed unless you want to pay for new framing, stucco work, and a new window. An exterior door is fixed. The doorway into the hall or living room is usually fixed. The sink drain and water lines can be moved, but every foot you move them adds plumbing work, and in a home on a slab foundation, which describes many Pahrump houses, moving a drain can mean cutting concrete. The range location depends on whether you have a gas line or a 240-volt electric outlet in that spot. The vent hood usually needs a path to the outside. A refrigerator needs a nearby outlet and, if it has an ice maker, a water line.
Once you have that list, you can see the shape of the problem. Some kitchens have one long clear wall and a short wall broken up by a window. Some have doors on three sides that leave only two usable walls. Some open fully into a living room, which leaves room for an island or peninsula but takes away wall space for upper cabinets. The cabinets you choose need to work with these limits. When a layout fights the room, the fix is usually expensive, and when it respects the room, the result feels natural even if the cabinets themselves are simple.
It also helps to decide early how much you want to change. There are roughly three levels of project. In a like-for-like replacement, the new cabinets go where the old ones were, the sink and range stay put, and the main changes are better boxes, better drawers, and a new look. In a modest reconfiguration, you might add a pantry, swap a base cabinet for a drawer stack, extend a run, or add a small island, but the plumbing and gas stay where they are. In a full layout change, you move the sink or range, remove a wall, or reshape the room. Each level costs more and takes longer than the one before it. Knowing which level you are in keeps the cabinet conversation realistic.
If you are not sure whether your current cabinets are worth keeping, the guide on when to replace old kitchen cabinets in Pahrump covers the condition signs, and the guide to common kitchen cabinet problems in Pahrump homes explains which layout issues tend to come up again and again. This guide assumes you have already decided new cabinets make sense and now need them to fit.
One more early decision is who will do the planning. Some homeowners draw their own layout, measure carefully, and order cabinets themselves. Others bring rough measurements to a cabinet showroom and work through a layout there. Others hire a designer or a contractor who handles everything. There is no single right answer, but the more of the measuring and thinking you do yourself, the better your conversations will go, because you will understand why each cabinet sits where it does. Even if someone else draws the final plan, you live in the kitchen and know where people walk, where groceries land, and where the dog sleeps.
How to Measure Your Kitchen for New Cabinets
Quick answer: Draw a simple floor plan, then measure each wall at counter height and near the ceiling, record every window and door with its trim, mark the location of plumbing, gas, outlets, switches, and vents, and measure ceiling height in several spots. Measure twice, write everything in inches, and take photos of each wall.
Accurate measurements are the single most important part of a cabinet layout. A plan built on a wall that is actually an inch shorter than you wrote down will not fit, and you usually discover that on installation day. The good news is that measuring a kitchen does not require special tools. A 25-foot tape measure, a pencil, graph paper or a printed grid, and a phone camera are enough for most rooms. A laser measure is handy for long walls and ceilings but is not required.
Step 1: Sketch the room
Make a rough top-down drawing of the room, close to scale. Number the walls clockwise, starting with the wall that holds the sink. Mark doors, windows, openings to other rooms, and any bump-outs such as soffits, chases, or a water heater closet. The sketch does not need to be pretty. It needs to show which wall is which so your numbers make sense later.
Step 2: Measure each wall
Measure each wall from corner to corner at about 36 inches off the floor, which is close to counter height, and again at about 84 inches, where upper cabinets usually sit. Walls are rarely perfectly straight or square, and the two numbers can differ by a quarter inch or more. Use the smaller number when planning. If you have old cabinets in place, measure the wall behind them where you can, or measure the cabinet run and note how far it stops from each corner.
Step 3: Record windows and doors
For each window, measure from the nearest corner to the outside edge of the trim, then measure the trim-to-trim width, the height from the floor to the bottom of the trim, and the height from the floor to the top of the trim. Do the same for doors and openings. Trim matters because cabinets and countertops have to stop before it or be scribed around it. Note which way each door swings and whether it hits anything when fully open.
Step 4: Mark utilities
Mark the center of the sink drain and the water supply lines, measured from the nearest corner and from the floor. Mark the gas stub or range outlet, the refrigerator outlet and water line, the dishwasher supply and electrical, every outlet and switch on the walls you will cover, and the vent duct. If your home has a water softener loop, a reverse osmosis line, or a garbage disposal switch in an odd spot, mark that too. Pahrump water is hard in many neighborhoods, and many homes have some kind of treatment, so these extra lines are common.
Step 5: Measure heights
Measure the ceiling height at several points. Many site-built homes have 8-foot ceilings, some newer homes have 9-foot or vaulted ceilings, and many manufactured homes have lower ceilings, sometimes with a slight slope. Note any soffits, beams, or ceiling fans that might interfere with tall cabinets or upper cabinets that run to the ceiling. Measure the floor too. If you plan to replace flooring, know whether the new floor will go in before or after the cabinets, because that changes the finished height of the base cabinets and the space under the dishwasher.
Step 6: Check for square and level
Use a level on the floor along each wall and note how far it is out over the length of the run. Check the corners with a framing square or the 3-4-5 method: measure 3 feet along one wall and 4 feet along the other, and the diagonal between those marks should be 5 feet. If the corner is out of square, installers will need fillers or scribing. This is normal, but it is better to know before you plan a tight run with no room to adjust.
Step 7: Photograph everything
Take a wide photo of each wall and close-ups of every outlet, pipe, and vent. Hold the tape measure in some photos so the scale is clear. These photos are worth bringing to any cabinet conversation, because they answer questions that a sketch cannot, such as whether a pipe comes through the wall or the floor.
When you are done, you should have a sketch with every wall length, every opening, every utility, and the ceiling height. Measure everything a second time on a different day. If the numbers match, you have a solid base for a layout. If they do not, measure a third time. The few minutes this takes are nothing compared to the cost of a cabinet that does not fit.
Common Kitchen Shapes and When Each One Fits
Quick answer: Most kitchens fall into one of six shapes: one-wall, galley, L-shape, U-shape, L or U with an island, and peninsula. The right shape depends on the room’s width, the number of doors and openings, how many people cook at once, and whether the kitchen opens to a living area.
Kitchen designers talk about layouts in a handful of basic shapes. Your kitchen probably already has one of them, and in many cases the best plan keeps that shape and improves what sits inside it. Knowing the strengths and limits of each shape helps you see whether a change is worth it.
One-wall kitchen
All cabinets and appliances sit along one wall. This is common in small homes, apartments, casitas, and some manufactured homes, and it works well when the kitchen opens to a living area. The weakness is limited counter space and long walking distances from one end to the other. Tall pantry cabinets at one end and a small movable island or table across from the run can make a one-wall kitchen feel much more useful.
Galley kitchen
Two parallel runs face each other with a walkway between them. Galleys are efficient for one cook because everything is a short turn away. They struggle when the walkway is too narrow, when doors at both ends turn the kitchen into a hallway, or when two people try to cook at once. The key measurement is the aisle width between the counter edges, covered in the clearance section below.
L-shape kitchen
Cabinets run along two walls that meet in a corner. This is one of the most common shapes in Pahrump tract and ranch homes because it leaves the rest of the room open for a table or island. The corner is the tricky part, since standard cabinets cannot simply meet there without wasted space. L-shapes are also the basis of the common “10×10” pricing benchmark that cabinet sellers use, which is covered in the guide on what a 10×10 kitchen cabinet package costs in Pahrump.
U-shape kitchen
Cabinets wrap three walls. U-shapes offer the most storage and counter space in a closed kitchen and keep traffic out of the work area. They have two corners to solve and can feel enclosed if upper cabinets run along all three walls. In a U-shape, the distance between the two parallel legs matters just as much as in a galley.
L or U with an island
Adding an island to an L or U creates a second work surface, more storage, and often seating. Islands need generous space on every side, and many kitchens that seem big enough turn out to be a few inches short once clearances are counted. The island section below explains how to check.
Peninsula
A peninsula is a run of cabinets attached to a wall or another run at one end and open at the other. It gives many of the benefits of an island, including seating, storage, and a counter that faces the living area, while needing less floor space because it only needs a walkway on three sides. Peninsulas are a good choice when a room is too narrow for an island.
| Shape | Best for | Watch out for |
|---|---|---|
| One-wall | Small or open rooms, casitas, studios | Limited counter space, long reach end to end |
| Galley | One main cook, narrow rooms | Narrow aisles, through traffic |
| L-shape | Most mid-size rooms, open plans | Corner storage, long runs |
| U-shape | Closed kitchens, heavy storage needs | Two corners, enclosed feel |
| With island | Larger rooms, two cooks, seating | Clearance on all sides |
| Peninsula | Rooms too narrow for an island | Blocking the path into the kitchen |
When you look at your sketch, ask which shape the room already wants to be. Doorways and windows usually decide it. If two walls are clear and the others are interrupted, an L is natural. If three walls are clear and the room is at least wide enough for a comfortable aisle, a U makes sense. If the room opens to a family area, a peninsula or island can connect the two. Changing the shape is possible, but it usually means moving utilities, which pushes the project into a higher level of cost and time.
Standard Cabinet Sizes and How They Add Up Along a Wall
Quick answer: Most stock and semi-custom cabinet lines use base cabinets about 34.5 inches tall and 24 inches deep, wall cabinets about 12 inches deep, and widths in 3-inch steps from about 9 to 48 inches. You fill a wall by combining widths, then use fillers to cover the gaps left by walls that are not an exact multiple of 3 inches.
Cabinet sizing feels confusing at first because every line has a long list of codes. The basic logic is simple. Cabinets are built in standard widths, depths, and heights, and a layout is a puzzle of fitting those standard boxes along your walls. Exact sizes vary by manufacturer, so treat the numbers here as typical, not universal, and always check the specification sheet for the line you are considering.
Base cabinets
Base cabinets sit on the floor and support the countertop. They are typically about 34.5 inches tall without the countertop, which brings the finished counter to about 36 inches once a standard countertop is added. Depth is typically about 24 inches, so a standard countertop with a small overhang ends up around 25 to 25.5 inches deep. Widths commonly run from about 9 inches up to 36 inches or more in 3-inch steps. Base cabinets come with doors, drawers, or a combination, and the choice matters more for daily use than most people expect.
Wall cabinets
Wall cabinets, also called uppers, hang above the counter. They are typically about 12 inches deep, with widths in the same 3-inch steps. Heights vary widely, with 30, 36, and 42 inches being common, along with shorter sizes for above the refrigerator or range. The usual gap between the countertop and the bottom of the upper cabinets is about 18 inches, though some people prefer a bit more for tall appliances on the counter.
Tall cabinets
Tall cabinets include pantry cabinets, oven cabinets, and utility cabinets. They often come in 84, 90, and 96-inch heights to suit different ceilings, with depths of 12 or 24 inches. A tall cabinet changes the feel of a run because it breaks the counter line, so it usually works best at the end of a run rather than in the middle.
How widths add up
Suppose a wall measures 123 inches between corners. You might place a 36-inch sink base, a 24-inch dishwasher opening, an 18-inch drawer base, a 30-inch range opening, and a 15-inch base cabinet. That adds up to 123 inches exactly. In practice you would leave a small filler at each end where the run meets a wall, because walls are rarely perfectly straight and doors and drawers need clearance. So you might shorten one cabinet by 3 inches and use fillers of about 1.5 inches at each end.
That simple example shows the main rule: lay out the fixed items first, such as the sink centered on a window, the dishwasher next to the sink, and the range opening, and then fill the remaining spaces with standard widths. Where the remaining space is not a multiple of 3 inches, fillers take up the difference. If you find yourself using a very wide filler, it usually means a different combination of cabinet widths would fit better.
Uppers line up with bases
Upper cabinets usually line up with the base cabinets below them so the vertical lines of the doors match. That is not a strict rule, but it looks cleaner. Above the sink, a window often interrupts the uppers. Above the range, a hood or microwave takes the place of a standard upper. Above the refrigerator, a shorter, deeper cabinet is common. Plan the uppers after the bases so they follow the same rhythm.
| Cabinet type | Typical depth | Typical height | Common widths |
|---|---|---|---|
| Base | About 24 in | About 34.5 in (36 in with counter) | About 9 to 36 in or more, 3-in steps |
| Wall (upper) | About 12 in | 30, 36, or 42 in common | About 9 to 36 in or more, 3-in steps |
| Tall / pantry | About 12 or 24 in | 84, 90, or 96 in common | 18, 24, 30, 36 in common |
| Vanity | About 21 in | About 31 to 34.5 in | About 24 to 72 in |
These figures are typical ranges for planning, not specifications from a particular line. Some lines offer extra-deep bases, shorter uppers, or different steps. Ask which sizes are available in the line you like before you finalize a plan, because a layout drawn for one line may need small changes for another. If you are comparing ready-to-assemble boxes with assembled ones, the guide on RTA vs assembled kitchen cabinets for Pahrump homes explains how the two compare.
Aisles, Clearances, and Work Zones
Quick answer: Widely used kitchen planning guidelines from the NKBA call for work aisles of at least about 42 inches for one cook and about 48 inches for two, and walkways of at least about 36 inches. Plan counter landing space beside the sink, range, and refrigerator, and check that every door and drawer can open fully without hitting another.
A kitchen can have beautiful cabinets and still feel cramped if the spaces between them are wrong. Clearance is the difference between a kitchen where two people can pass each other with a hot pan and one where somebody always has to step back. The National Kitchen and Bath Association publishes planning guidelines that many designers use as a starting point. The figures below are commonly cited from those guidelines. Your local building department and the specific appliance instructions are the final word for anything safety related.
Work aisles and walkways
A work aisle is the space in front of counters and appliances where someone stands to cook or clean. A walkway is a path people use to pass through. For one cook, many designers aim for a work aisle of about 42 inches between counter edges. For two cooks, about 48 inches is common. A walkway that is not a work area is often planned at about 36 inches. These numbers are measured from the edge of the countertop, not from the face of the cabinets, and they include the space where appliance doors swing open.
In a galley, the aisle width decides almost everything. Below about 42 inches, two people cannot work comfortably and an open dishwasher blocks the whole kitchen. Above about 60 inches, the galley loses its efficiency because the cook walks back and forth across a gap. In a kitchen with an island, every side of the island needs its own aisle check.
Work zones instead of only the triangle
You may have heard of the work triangle, the idea that the sink, range, and refrigerator should form a triangle with sides that are neither too short nor too long. It is still a useful check, especially in smaller kitchens. Many modern kitchens are easier to plan as zones instead. A prep zone near the sink with counter space and knife and cutting board storage. A cooking zone around the range with pots, pans, utensils, and spices within reach. A cleanup zone around the sink and dishwasher with dish storage close by. A cold storage zone around the refrigerator with a landing counter. A coffee or snack zone out of the main path, so kids and guests do not walk through the cook’s space.
Zones help you decide which cabinets go where. Drawers for pots belong beside the range, not across the room. Dish storage belongs within a step or two of the dishwasher. Trash and recycling belong near the sink and prep area. When cabinets support zones, the kitchen feels easier to use even if the total storage is the same.
Landing space
Landing space is the counter next to an appliance where you set things down. Commonly cited guidelines call for counter space on both sides of the sink, on at least one side and ideally both sides of the cooktop or range, and next to the refrigerator on the handle side. A refrigerator with no landing counter nearby means groceries end up on the floor or across the room. A range jammed against a wall or tall cabinet with no counter on that side is awkward and can be a safety problem. Check the appliance installation instructions for any required side clearances to walls or cabinets.
Door and drawer swing
Every door and drawer needs room to open. At a corner, two drawers can collide if the cabinets meet without a filler. A dishwasher door can hit a base cabinet handle across a narrow galley. An oven door can block a walkway. Refrigerator doors need clearance from walls to open far enough for crisper drawers to slide out. Go through your plan and imagine opening each door fully. If two things cannot be open at the same time, decide whether that is acceptable or whether the plan needs to shift.
Counter height and reach
Standard counter height of about 36 inches suits many people. Tall cooks may prefer a higher prep area, and some households need a lower section for a child or a seated user. Upper cabinets typically start about 18 inches above the counter, which puts the top shelf of a tall upper out of easy reach for many people. If you are short, plan more drawers below and fewer tall uppers. If you need accessibility features, mention that early so the layout can plan for clear floor space and reachable storage.
Fitting Appliances Into the Cabinet Run
Quick answer: Choose your appliances, or at least their sizes, before you finalize cabinets. Write down the exact width, height, depth, door swing, and installation clearances for the range, refrigerator, dishwasher, microwave, and hood, then plan cabinet openings around those numbers rather than around a typical size.
Appliances are the most common reason a cabinet layout fails. A refrigerator that is an inch taller than the cabinet above it, a range that sticks out farther than expected, or a dishwasher that cannot fit under a thick countertop with new flooring can all derail an installation. The solution is to treat appliance specifications as part of the measurements, not an afterthought.
Refrigerator
Refrigerators vary more than any other appliance. Standard-depth models stick out past the counter, while counter-depth models sit closer to flush. Widths around 30, 33, and 36 inches are common, and heights vary widely. Check the manufacturer’s required clearance at the top and sides for air flow, and the clearance needed for the doors to open far enough to remove drawers. If the refrigerator sits next to a wall, a filler or panel between the refrigerator and the wall often helps the door open. If you plan to keep your current refrigerator for now and replace it later, plan the opening for a size you may buy, not only the one you own.
Range and cooktop
Most freestanding and slide-in ranges are about 30 inches wide, with larger sizes available. The opening between base cabinets needs to match the specific model, and slide-in ranges have different countertop and backsplash requirements than freestanding ones. The hood or microwave above needs the clearance listed in its instructions. If you are switching from electric to gas or the other way around, the range location may be limited by where the gas line or high-voltage outlet already sits.
Dishwasher
Most dishwashers are about 24 inches wide, with smaller sizes for compact kitchens. The dishwasher usually sits right next to the sink so the drain and supply lines are short. Check the height under the counter after any new flooring is installed. If you plan to put in thicker tile or a new floor over the old one, the dishwasher opening may shrink, which can make it hard to remove the dishwasher later. Many installers prefer to run flooring under the dishwasher space for that reason.
Microwave
Microwaves can go over the range, in a wall cabinet, in a base drawer unit, or on the counter. Over-the-range models need a matching upper cabinet width and proper venting. A drawer microwave needs a specific base opening. A countertop microwave takes up landing space, so plan a spot for it that does not crowd the prep zone.
Laundry and other appliances
In some Pahrump homes, especially manufactured homes and smaller houses, the washer and dryer sit in or next to the kitchen. A wine cooler, beverage fridge, or second freezer may also need a spot. Each of these takes a cabinet opening and an outlet. Plan them now so you do not end up removing a base cabinet later.
| Appliance | Write down | Common planning issue |
|---|---|---|
| Refrigerator | Width, height, depth with and without doors, side and top clearance | Door cannot open fully next to a wall |
| Range | Width, type (freestanding or slide-in), fuel, hood clearance | Opening built for the wrong range type |
| Dishwasher | Width, height range, side of sink | New flooring shrinks the opening |
| Microwave | Location, venting, cabinet width above | Upper cabinet width does not match |
| Hood | Width, duct path, height above cooktop | No route to the outside |
Bring the appliance model numbers or specification sheets when you talk about cabinets. If you have not chosen appliances yet, pick a likely size range and plan for flexibility, such as a refrigerator opening with a removable filler. The guide to kitchen cabinet installation in Pahrump covers what happens on the day cabinets go in and why accurate appliance information keeps the schedule on track.
Corners, Fillers, and End Panels
Quick answer: Corners need a plan, such as a blind corner cabinet, a lazy Susan, or a diagonal unit, plus fillers so doors and drawers on both sides can open. Fillers also cover gaps at walls and appliances. Finished end panels cover any cabinet side that will be seen, such as the end of a run, a refrigerator side, or an island.
Corners and edges are where layouts succeed or fail in the details. A run of cabinets is easy to plan in the middle. Where it turns a corner, meets a wall, or sits next to an appliance, small decisions affect how the kitchen looks and works for years.
Corner options
An L-shape or U-shape kitchen has inside corners where two runs meet. There are a few common ways to handle them. A blind corner cabinet extends into the corner on one side, with a door on the other side. It uses the space but makes the back hard to reach unless you add pull-out hardware. A lazy Susan cabinet uses a rotating shelf in an L-shaped or round box to make corner storage easy to reach. A diagonal corner cabinet sits at an angle across the corner, which gives a larger door but uses more wall length. In upper cabinets, a diagonal corner or a blind corner upper is common. Some people simply close off the corner and accept lost space in exchange for a simpler and less expensive layout. Each choice has tradeoffs, and the right one depends on how much storage you need and what hardware the cabinet line offers.
Fillers
Fillers are narrow strips made in the same finish as the cabinets. They cover gaps between a cabinet and a wall, between two cabinets at a corner, or next to an appliance. In a corner, a filler on each side keeps drawer fronts and handles from colliding. Next to a wall, a filler can be scribed, which means cut to follow an uneven wall, so the gap looks tight. Next to a refrigerator, a filler helps the door swing open. Most layouts need several fillers. Very wide fillers can look odd, so if your plan needs a filler wider than about 3 to 6 inches, check whether a different cabinet width would fit better.
End panels and finished sides
Any cabinet side that will be visible, such as the end of a run, the side of a tall pantry, the side of a refrigerator enclosure, or the back and ends of an island, usually needs a finished panel. Some cabinet lines have finished sides on certain boxes, and others use separate panels that attach to the box. Panels give the kitchen a built-in look and protect the box. Count every exposed side in your plan, because missing panels are a common reason an order comes up short.
Toe kicks, crown, and trim
The toe kick is the recessed strip at the bottom of base cabinets. Light rail sits under the upper cabinets and hides under-cabinet lighting. Crown molding sits on top of the uppers. These trim pieces are often ordered separately. When you count cabinets, count trim too, measured in linear feet with some extra for cuts.
A good way to check corners and fillers is to draw a simple elevation of each wall, which is a straight-on view showing the cabinets as they will look standing in front of them. On an elevation, you can see whether door handles line up, where fillers land, how the uppers relate to the window, and whether the run looks balanced. Many cabinet sellers can draw elevations for you from your measurements, but sketching your own first helps you notice problems early.
Want Help Turning Your Measurements Into a Layout?
Bring your sketch, wall measurements, photos of each wall, and your appliance sizes. Pahrump Wholesale Kitchen and Bathroom Cabinets sells kitchen and bathroom cabinets for homeowners across Pahrump and Nye County. At the showroom you can see cabinet boxes, drawers, and corner options in person, talk through how your room could be laid out, and ask which sizes and options are available right now. Pahrump Wholesale Kitchen and Bathroom Cabinets is at 4760 Pahrump Valley Blvd #4, Pahrump, NV 89048 (Carberry Square).
Islands and Peninsulas: Do You Have Room?
Quick answer: An island needs space for itself plus a comfortable aisle on every working side, which is why many kitchens that seem big enough cannot fit one. Measure from the counter edges, not the cabinet faces, include seating space if you want stools, and consider a peninsula if the room is too narrow for an island with good aisles.
Islands are one of the most requested features in kitchen remodels. They add counter space, storage, and seating, and they give an open kitchen a natural center. They also take up a lot of floor space, and a crowded island makes a kitchen harder to use than having no island at all.
The basic island math
Start with the room width between the perimeter counter edges. Subtract the aisle on each side of the island, using the clearance numbers from earlier: about 42 inches per side for a one-cook kitchen, and about 48 inches if two people work at once or if the aisle includes an appliance door. Whatever is left is the maximum island depth. Many working islands are at least about 24 inches deep for a single row of base cabinets, and deeper if they include seating overhang or back-to-back cabinets. If the math leaves less than about 24 inches, an island will probably feel cramped, and a peninsula, a narrow cart, or a table may be a better fit.
For example, if the space between the counter along one wall and the counter along the opposite wall measures 132 inches, two aisles of 42 inches each use 84 inches, which leaves 48 inches for the island. That is enough for a base cabinet row plus a seating overhang. If the space measures 108 inches, the same aisles leave only 24 inches, which fits a narrow island with no seating. If the space is 96 inches, there is no comfortable room for an island at all.
Seating at an island
If you want stools, plan the counter overhang and the space behind the stools. Commonly cited guidelines suggest about 24 inches of counter width per seat and enough knee space for the counter height you choose, either standard height or a raised bar. Behind the seated person, allow room for others to walk by, and do not let stools back into a main work aisle. Large overhangs need proper support brackets or legs, which affects the cabinet plan underneath.
What goes in the island
An island can hold a sink, a cooktop, a dishwasher, drawers, open shelves, or simply storage. A sink or cooktop in the island means running plumbing, gas, electric, or venting through the floor, which costs more and is harder on a slab. Storage-only islands are the simplest. Drawer stacks on the working side and shallow cabinets or panels on the seating side are common. Check local electrical requirements for outlets on islands, since building codes often require them on countertop areas.
Peninsulas as an alternative
A peninsula attaches to the end of a run, so it only needs an aisle on the sides that are open. That makes it a practical choice for narrower rooms. A peninsula can include seating on the outside, storage on the inside, and a clear line of sight to a living area. The main risk is creating a dead end or forcing traffic through the work zone, so check how people enter the kitchen before you choose where the peninsula sits.
If your kitchen is on the small side, the guide on small kitchen cabinets and storage ideas for compact Pahrump spaces has more options for adding storage without an island.
Cabinet Layouts by Pahrump Home Type
Quick answer: Pahrump has a wide mix of homes, including manufactured homes, older ranch houses, newer tract homes, and custom homes on larger lots. Each type tends to have its own kitchen quirks, such as lower ceilings and lighter walls in manufactured homes or open plans with long runs in newer homes, and the cabinet layout should account for them.
Pahrump grew quickly over the past few decades, and its housing reflects that. Within a few miles you can find older manufactured homes, newer manufactured homes on permanent foundations, modest ranch houses, tract subdivisions, and custom homes on acre lots. The kitchen in each kind of home brings different constraints. These are general patterns, not rules, so measure your own home rather than assuming.
Manufactured homes
Kitchens in manufactured homes are often long and narrow, sometimes a galley or one-wall plan along one side of the home. Ceilings may be lower than in a site-built house, and some have a slight slope. Interior walls can be thinner, and studs may be spaced differently, which affects how upper cabinets are anchored. Plumbing often runs through the floor rather than the wall. When planning cabinets for a manufactured home, measure ceiling height at several points, locate studs or framing for wall cabinets, and check whether the floor can support heavy items such as stone countertops. Some homeowners choose shorter upper cabinets or a run of open shelving to suit lower ceilings. Ask a qualified installer about anchoring before you choose tall or heavy cabinets.
Older ranch and site-built homes
Older site-built homes often have closed kitchens with doors to several rooms, soffits above the upper cabinets, and appliance spaces sized for older appliances. Removing a soffit can let new upper cabinets run taller, but soffits sometimes hide ducts or plumbing, so check before planning around their removal. Older homes may also have walls that are less square, which means more fillers and scribing. For a pre-1978 house where the work involves disturbing painted surfaces, read the EPA’s guidance on the Lead Renovation, Repair and Painting Program before work starts.
Newer tract homes
Newer subdivision homes often have open kitchens facing a family room, with an island or peninsula already in place. The layout usually works, and many owners keep the same footprint while upgrading the cabinets. Common changes include replacing a builder-grade island with a larger or better-equipped one, adding a pantry cabinet, running uppers to the ceiling, or swapping door cabinets for drawers. Because these homes are similar to their neighbors, a well-planned upgrade can stand out without a full layout change.
Custom homes on larger lots
Custom homes in the valley sometimes have larger kitchens, higher ceilings, and features such as walk-in pantries, butler’s pantries, or outdoor kitchen connections. Long runs and tall ceilings need careful planning so the kitchen does not look like an endless wall of identical doors. Varying cabinet heights, adding a hutch or open section, using a different finish on the island, and lining up tall cabinets with architectural features all help. Large kitchens also need closer attention to work zones, because the walking distance between the sink, range, and refrigerator can grow too long.
Casitas, guest houses, and rentals
Many Pahrump properties include a casita, guest house, or rental unit with a small kitchen. These usually call for a compact one-wall or galley layout, durable finishes, and simple hardware. A short run with a sink base, a few drawers, a small range or cooktop, and a tall pantry can cover the basics. For a rental, durable boxes and drawer construction matter more than trendy details.
Matching Cabinet Storage to How You Cook
Quick answer: Count what you actually store, then choose cabinet types to match. Drawers usually beat doors in base cabinets for pots, dishes, and utensils. Tall pantry cabinets with pull-outs suit dry goods. Plan specific spots for trash and recycling, baking sheets, small appliances, and cleaning supplies so nothing ends up on the counter.
A layout is not only about fitting boxes on walls. It is also about choosing the right type of box for each spot. Two kitchens with the same footprint can work very differently depending on whether the bases are doors or drawers and where the pantry sits.
Start with an inventory. Open every cabinet and drawer in your current kitchen and note what is inside. Count pots and pans, large serving pieces, small appliances, dry goods, spices, baking sheets, cleaning supplies, and items that currently live on the counter because they have no home. Note what you use every day and what you use a few times a year. This list tells you what the new cabinets need to hold.
Drawers versus doors
Base cabinets with drawers let you see and reach everything without kneeling and digging. Deep drawers suit pots, pans, and dishes. Shallow drawers suit utensils, knives, and spices. Many cooks find that replacing most door bases with drawer bases makes the kitchen easier to use. Drawer bases often cost more than door bases in the same line, so many layouts mix the two, using drawers near the range and prep area and doors under the sink and in less-used spots.
Pantry storage
A tall pantry cabinet, often 18 to 24 inches wide and 24 inches deep, holds a surprising amount of food, especially with roll-out shelves. A shallower 12-inch-deep pantry keeps cans and jars one or two rows deep so nothing gets lost. If your home has a walk-in pantry, you may not need a tall cabinet at all and can use that wall space for more counter. If not, a pantry at the end of a run near the refrigerator is a common choice.
Trash, recycling, and cleaning
A pull-out trash cabinet near the sink and prep area keeps bins out of sight and within reach. Plan a second bin for recycling if you sort it. The sink base usually holds cleaning supplies, but water treatment equipment, a disposal, and plumbing can take up much of that space, especially in Pahrump homes with softeners or filters under the sink. Measure what is there now before deciding how much storage the sink base can provide.
Specialty storage
Narrow cabinets with vertical dividers hold baking sheets, trays, and cutting boards. Appliance garages keep a mixer or coffee maker on the counter but behind a door. Spice pull-outs next to the range keep jars within reach. Corner solutions, covered earlier, recover space that would otherwise be lost. Not every line offers every insert, so ask which accessories are available for the cabinets you are considering.
Plan for the next ten years
Think about how the household may change. A growing family needs more dish and snack storage. Retirees may want fewer high cabinets and more drawers. A home that might become a rental needs durable, simple storage. A layout that only works for the way you cook today may feel cramped later. If you are thinking about resale, the guide on whether new kitchen cabinets can improve home value in Pahrump covers what buyers tend to notice.
Desert Details That Affect Cabinet Layout
Quick answer: Strong sun, dry air, dust, and hard water all affect where cabinets should go. Keep wood and painted cabinets out of direct afternoon sun where possible, leave room for water treatment under the sink, allow for wood movement with proper clearances, and plan ventilation so the range does not cook the cabinets beside it.
Pahrump sits in the Mojave Desert, with long hot summers, strong sunlight, very low humidity much of the year, and occasional wind and dust. The National Weather Service climate summary for the Las Vegas area describes the hot, dry pattern that the wider region shares. These conditions are not just a finish issue. They also affect layout.
Sun and windows
West and south-facing kitchen windows bring intense afternoon light. Cabinets right next to those windows, or on a wall that gets direct sun for hours, can fade or dry out faster than cabinets in shade. When possible, plan tall cabinets and painted panels away from the hottest window, and consider window treatments. If a run must sit in direct sun, ask about finishes and materials that handle UV and heat well.
Dry air and wood movement
Solid wood expands and contracts with moisture. In a very dry climate, wood shrinks, which can open gaps in joints or panels. Cabinets that arrive from a more humid place may move after delivery. Installers often leave cabinets in the house for a short time before installation so they adjust to indoor conditions. In the layout, avoid jamming cabinets so tightly between walls that they cannot move at all. Fillers and scribe strips give a little room.
Hard water and the sink base
Hard water leaves mineral deposits and can shorten the life of fixtures, which is why many local homes have softeners, filters, or reverse osmosis systems. These often live in the sink base and take space from storage. If you plan to add treatment equipment, size the sink base so it fits with room for service. A water-resistant liner on the sink base floor helps protect the box from small leaks.
Heat around the range and ovens
Ranges and wall ovens give off heat, and summer kitchens can already be warm. Follow the appliance instructions for clearances to cabinets, and make sure the hood vents properly. Some cabinet finishes, especially wrapped or thermofoil fronts, can be sensitive to heat, so heat shields or a filler next to an oven may be recommended. Ask about the line’s heat guidance before placing cabinets right beside a range.
Dust and closed storage
Fine desert dust settles on open shelves quickly. Open shelving looks good in photos but means more dusting in Pahrump, so many homeowners keep open sections small and use closed cabinets or glass doors for display. Tight-fitting doors and drawers also keep dust out of dish storage. If you want open shelves, place them away from exterior doors and windows that get opened often.
Cabinet quality also matters in a dry climate. The Kitchen Cabinet Manufacturers Association has a certification program in which sample cabinets are tested for how well the structure and the finish hold up. If you are comparing lines, asking whether a line is certified is one way to compare construction. For composite wood boxes, the EPA’s formaldehyde emission standards for composite wood products and the California Air Resources Board composite wood program explain the labels you may see.
Kitchen Cabinet Layout Mistakes to Avoid
Quick answer: The most common layout mistakes are measuring once, choosing cabinets before appliances, skipping fillers at corners, planning aisles from cabinet faces instead of counter edges, forgetting end panels and trim, and squeezing in an island that leaves too little room to walk.
Most layout mistakes are easy to avoid once you know them. Here are the ones that come up most often in kitchen projects.
- Measuring once. One wrong number can throw off a whole run. Measure twice on different days and use the smaller measurement when walls are not straight.
- Choosing cabinets before appliances. Appliance sizes drive cabinet openings. Know the sizes first, or plan flexible openings.
- No fillers at corners. Drawers and handles collide when two runs meet without a filler. Plan a filler on each side of an inside corner.
- Measuring aisles from the wrong place. Aisles are measured from counter edge to counter edge, not from cabinet faces. A few inches of countertop overhang on each side add up.
- Forgetting panels and trim. Exposed sides, island backs, toe kicks, light rail, and crown are often separate items. Count them.
- Squeezing in an island. An island with narrow aisles makes the kitchen harder to use. Do the island math before you commit.
- Blocking a window. Tall cabinets beside a window can block light and look awkward. Check the trim width and window position on the elevation.
- Ignoring door swings. Check that every door, drawer, and appliance can open fully, and that open doors do not block a walkway.
- Too many tall uppers. Upper shelves that nobody in the household can reach become dead storage. Use drawers below instead.
- Forgetting outlets and switches. New cabinets may cover an outlet or leave a switch in an odd spot. Plan any electrical changes before the cabinets arrive.
- Not planning for floors. Decide whether new flooring goes in before or after cabinets, and check what that does to the dishwasher opening and toe kick height.
- Skipping the elevation drawing. A floor plan alone does not show how the wall will look. Draw or ask for elevations of each wall.
The guide on common mistakes to avoid when buying kitchen cabinets covers buying mistakes beyond layout, and the Pahrump cabinet ordering timeline guide explains how lead times affect your planning.
What to bring when you are ready to talk about a layout
- Your sketch with wall lengths, openings, and utilities marked
- Ceiling height and any soffits or beams
- Photos of each wall with the tape measure visible
- Model numbers or measured sizes of each appliance
- Notes on what you keep in the kitchen and what you would change
- Your rough budget and timeline
- Photos of door styles and colors you like
With these in hand, a cabinet conversation goes from vague ideas to a real plan. For style decisions, the guides on cabinet styles for Pahrump homes and the best kitchen cabinet colors for Pahrump homes in 2026 pick up where this guide leaves off.
Pahrump Wholesale Kitchen and Bathroom Cabinets
Pahrump Wholesale Kitchen and Bathroom Cabinets sells kitchen and bathroom cabinets to homeowners, landlords, builders, and remodelers across Pahrump and Nye County from its Carberry Square showroom. If you are planning a new layout, bring your measurements, wall photos, and appliance sizes, see cabinet boxes and corner options in person, and ask which sizes and options are available right now.
- Address: 4760 Pahrump Valley Blvd #4, Pahrump, NV 89048
- Phone: (702) 678-5154
- Email: info@pahrumpwholesalekitchenandbathroomcabinets.com
- Showroom: Pahrump kitchen cabinets showroom
- About: About the store
- Contact: Contact us
- Maps: Google Maps listing
A layout drawn from real measurements is easier to get right than one drawn from memory, so measure first and bring the numbers with you.
Frequently Asked Questions About Kitchen Cabinet Layouts in Pahrump
How do I measure my kitchen for new cabinets?
Sketch the room, then measure each wall corner to corner at about counter height and again near the ceiling, and use the smaller number. Record every window and door including trim, mark the sink drain, water lines, gas or range outlet, and other outlets, and measure ceiling height in several spots. Photograph each wall with the tape visible and measure everything a second time.
What is the most common kitchen layout in Pahrump homes?
L-shaped kitchens are very common in Pahrump tract and ranch homes, often with an island or peninsula facing a family room in newer houses. Galley and one-wall kitchens are common in manufactured homes, casitas, and smaller houses. The best layout for your home depends on its doors, windows, utilities, and room width rather than on what is typical.
How much space do I need between kitchen counters?
Commonly cited NKBA planning guidelines suggest a work aisle of at least about 42 inches for one cook and about 48 inches for two, measured from counter edge to counter edge. Walkways that are not work areas are often planned at about 36 inches. Check appliance door swings too, since an open dishwasher or oven needs room in the aisle.
Do I have room for a kitchen island?
Measure between the counter edges on opposite sides of the room, subtract an aisle of about 42 to 48 inches on each working side, and see what is left. If the remaining depth is at least about 24 inches, a narrow island may fit, and more is needed for seating. If not, a peninsula, a cart, or a table may serve the room better.
What are standard kitchen cabinet sizes?
Many stock and semi-custom lines use base cabinets about 34.5 inches tall and 24 inches deep, wall cabinets about 12 inches deep in 30, 36, or 42-inch heights, and widths in 3-inch steps from about 9 to 36 inches or more. Tall pantry cabinets often come in 84, 90, or 96-inch heights. Sizes vary by line, so confirm with the specification sheet.
What are cabinet fillers and why do I need them?
Fillers are narrow strips in the cabinet finish that close gaps between cabinets and walls, at corners, and next to appliances. They let doors and drawers open without hitting each other or a wall, and they can be scribed to follow uneven walls. Most kitchens need several. A very wide filler usually means another combination of cabinet widths would fit better.
Should I choose appliances before cabinets?
Yes, or at least know the sizes you plan to buy. The refrigerator, range, dishwasher, microwave, and hood each need an opening that matches the specific model, including clearances listed in the installation instructions. Planning cabinets around typical sizes and buying appliances later is one of the most common reasons a cabinet layout does not fit.
How do I handle a corner in an L-shaped kitchen?
Common options include a blind corner cabinet with or without pull-out hardware, a lazy Susan cabinet, or a diagonal corner cabinet, and some people simply close off the corner. Plan a filler on each side of the corner so drawers and handles do not collide. The best choice depends on how much storage you need and what hardware the cabinet line offers.
Are drawers better than doors in base cabinets?
For many cooks, yes. Drawers let you see and reach pots, dishes, and utensils without kneeling and digging through a deep cabinet. Drawer bases often cost more than door bases in the same line, so many layouts use drawers near the range and prep area and doors under the sink or in less-used corners where plumbing or equipment takes up space.
What changes when planning cabinets for a manufactured home?
Manufactured home kitchens are often long and narrow with lower ceilings, thinner walls, different framing, and plumbing through the floor. Measure ceiling height at several points, locate framing for anchoring wall cabinets, and check whether the floor can support heavy countertops. Shorter upper cabinets suit many of these kitchens. Ask a qualified installer about anchoring before choosing tall or heavy cabinets.
How does the desert climate affect kitchen cabinet layout?
Strong sun, dry air, dust, and hard water all matter. Keep cabinets out of hours of direct afternoon sun where possible, leave room in the sink base for water treatment equipment, use fillers so wood can move slightly in dry air, follow appliance heat clearances, and limit open shelving that collects dust. These choices help cabinets look and work better for longer.
Where is Pahrump Wholesale Kitchen and Bathroom Cabinets located?
Pahrump Wholesale Kitchen and Bathroom Cabinets is at 4760 Pahrump Valley Blvd #4, Pahrump, NV 89048, in Carberry Square. Call (702) 678-5154 or open the Google Maps listing for directions. The showroom serves Pahrump and nearby Nye County communities, and you can bring your kitchen measurements, wall photos, and appliance sizes to compare cabinet boxes and corner options in person. You can also reach the team through the contact page.
Find Pahrump Wholesale Kitchen and Bathroom Cabinets
View Pahrump Wholesale Kitchen and Bathroom Cabinets on Google Maps
Plan the Layout First, Then Choose the Cabinets
Cabinets that fit your Pahrump home start with careful measurements, a kitchen shape that suits the room, clear aisles, and appliance openings sized to real models. Get those right and every style and color choice afterward becomes easier. Call Pahrump Wholesale Kitchen and Bathroom Cabinets at (702) 678-5154 with your sketch and photos, compare cabinet boxes and corner options in person, and ask which sizes and options are available right now.
4760 Pahrump Valley Blvd #4, Pahrump, NV 89048 · Carberry Square · Serving Pahrump & Nye County