
Pahrump Wholesale Kitchen and Bathroom Cabinets · Kitchen Measuring Guide
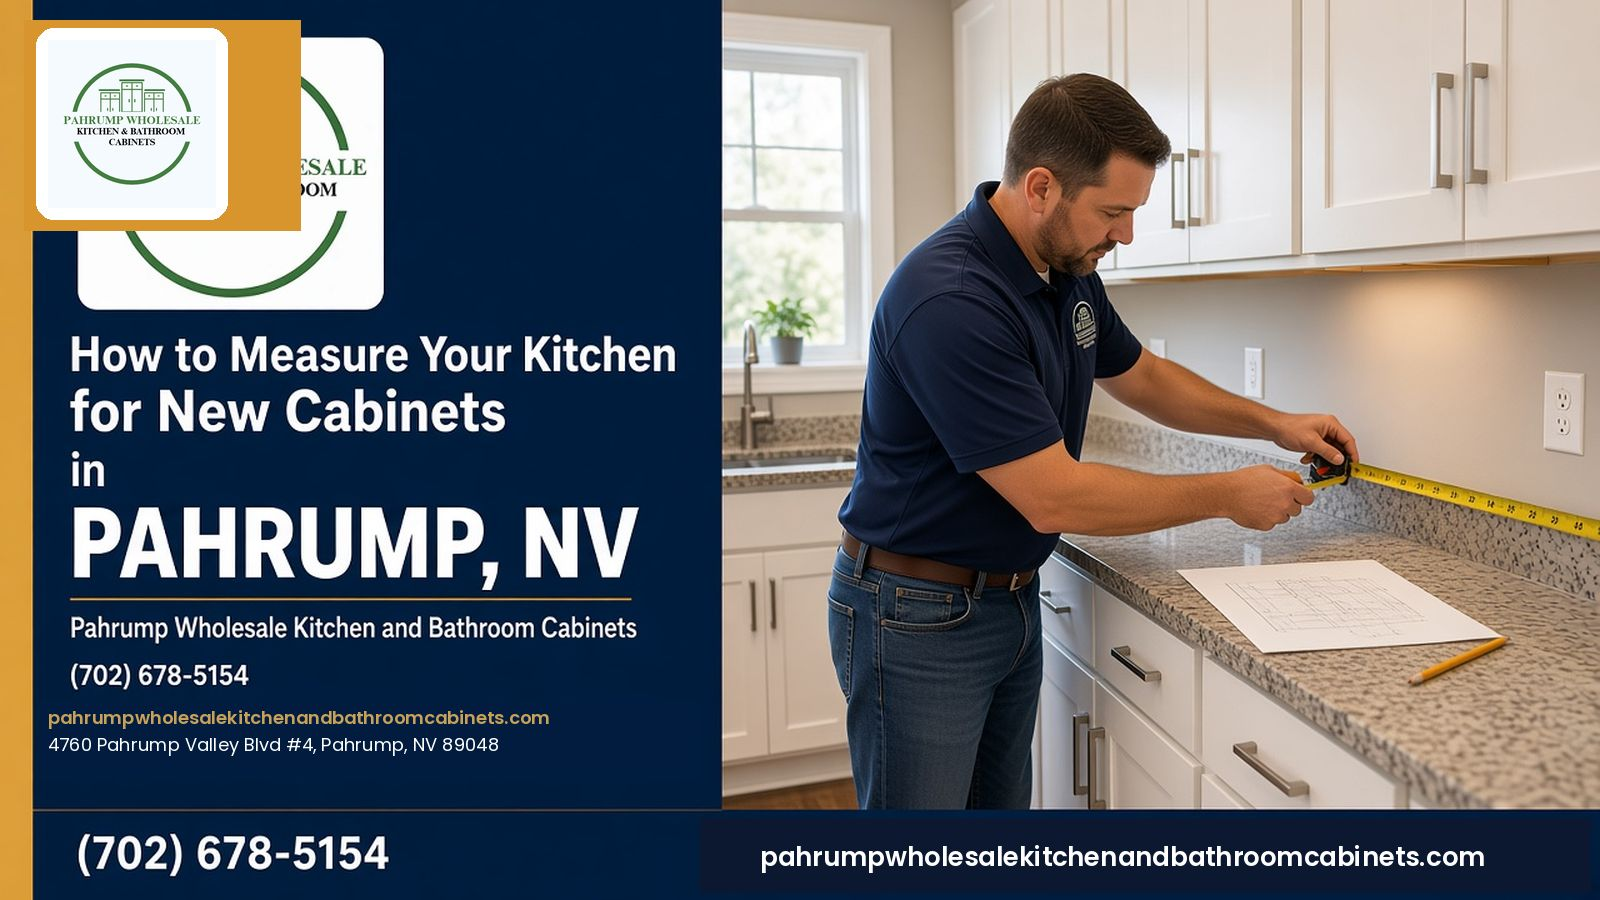
How to Measure Your Kitchen for New Cabinets in Pahrump, NV
Accurate measurements are what turn a pretty cabinet door into a kitchen that actually fits. In a Pahrump home, walls are not always square, ceilings are not always one height, and existing counters can hide the true length of a run. This guide is a measuring playbook: what tools to use, how to record walls, windows, doors, ceilings, utilities, and appliances, and how to catch mistakes before anyone orders a box. It is not a full layout or island-sizing tutorial — that work sits in how to choose cabinets that fit your Pahrump home’s layout. Once your numbers are on paper, you can bring them to Pahrump Wholesale Kitchen and Bathroom Cabinets at 4760 Pahrump Valley Blvd #4, Pahrump, NV 89048, or call (702) 678-5154.
How do you measure a kitchen for new cabinets in Pahrump, NV?
Sketch the room first, then measure every wall at about counter height and again near the ceiling, and use the smaller number if they differ. Record each window and door including trim, mark plumbing, gas, and outlets, measure ceiling height in several spots, and write down appliance widths, depths, heights, and door swings. Measure twice, preferably on different days, and photograph each wall with the tape visible. The figures on this page are educational methods, not a substitute for a final site measure on a custom or tight job, and not a quote from Pahrump Wholesale Kitchen and Bathroom Cabinets.
Local context: Bring the sketch, photos, and appliance sizes to the Carberry Square showroom at 4760 Pahrump Valley Blvd #4, Pahrump, NV 89048. Call (702) 678-5154 or open the Google Maps listing. The showroom page describes design help if you arrive with measurements.
Why Measurements Come Before Door Style
Quick answer: A cabinet run is a math problem in inches. If the wall is shorter than the boxes you picked, no finish will save the fit. Measure first, then choose doors and colors.
It is tempting to fall in love with a Shaker sample and work backward. That is how people order a 36-inch sink base for a wall that only had 33 inches of clear space once the dishwasher and a filler were counted. Measurements are the constraint. Style is the decision you make inside that constraint.
This page stays on the tape and the sketch. Kitchen shapes, aisle widths, and island go/no-go decisions are covered in the layout guide. Use both: measure here, plan the shape there. If your room is tight, small-kitchen storage ideas helps after you know the actual widths.
Tools You Need (and What You Can Skip)
Quick answer: A 25-foot tape, a pencil, graph paper or a printed grid, and a phone camera will do most kitchens. A laser measure is handy, not required. A level helps you notice walls that lean.
- Tape measure, 25 feet. Long enough for most Pahrump kitchen walls. Lock it, read from the same edge every time, and do not trust a floppy mid-span on a long wall — get a helper or a laser check.
- Pencil and paper. Graph paper makes it easier to keep walls straight on the page. The sketch does not need to be to scale at first; the numbers do.
- Phone camera. Photograph each wall with the tape in the shot. Photos catch soffits, outlets, and window trim that a sketch misses.
- Optional laser measure. Useful for long walls and ceilings. Still verify an odd number with the tape. Lasers can misread on glossy tile or a busy backsplash.
- Optional level or a straight edge. If a bubble is off, measure the wall at more than one height and use the smaller length when you plan.
- Stepladder, used carefully. For ceiling and high window trim. Do not lean off a counter. If you cannot reach safely, skip the high number and flag it for a later measure.
You do not need cabinet design software to measure. You do not need to buy a contractor’s laser package for a first sketch. You do need consistent units: work in inches, not a mix of feet-and-inches on one wall and decimal feet on another. Write “120-1/2” or “120.5” and stick to one style.
Sketch the Room First, Then Add Numbers
Quick answer: Draw a rough top view: walls, doorways, windows, and any bump-outs such as soffits, chases, or a water-heater closet. Label the walls so each measurement has a home.
Start at a doorway you can name (“from the dining room”) and walk the room clockwise. Draw each wall as a line. Mark openings as gaps. Note which way doors swing. The drawing can be ugly. It cannot be ambiguous. If two walls look the same length on the page, the labels and numbers have to tell them apart.
Add a north arrow only if it helps you remember which wall gets afternoon sun. That matters later for finish color, not for the inch count. For now, the sketch is a container for measurements.
If the kitchen is a galley, draw both long walls and both ends, even if one end is just a refrigerator wall. If it is an L, draw the inside corner clearly. Do not skip a short wall because “nothing goes there.” That wall still has a dimension, and a tall pantry might want it.
How to Measure Each Kitchen Wall
Quick answer: Measure corner to corner at about 36 inches off the floor (near counter height) and again near the ceiling. If the two numbers differ, plan with the smaller one and note the difference.
Existing counters and backsplashes can hide the true wall. Where you can, measure from drywall or plaster, not from the face of an old backsplash return. If you cannot get to the wall, measure the old counter and write “measured over existing counter — confirm after demo.”
For a long wall, don’t rely on a tape that sags in the middle. Take it in two segments and add them, or have a helper hold the mid-span against the wall. Record the total and the segments. If they disagree, measure a third time.
| What you record | How | Why |
|---|---|---|
| Wall length at ~36 inches | Corner to corner, tight to the wall | This is close to where base cabinets and counters will sit |
| Wall length near the ceiling | Same corners, higher up | Catches walls that lean or are out of square |
| The smaller of the two | Circle it on the sketch | Cabinets cannot stretch a short wall |
| The difference | Write it in the margin | Tells an installer that fillers or scribe may be needed |
Inside corners are not always 90 degrees. You do not have to compute the angle on day one, but if a corner looks obviously off, write “corner may not be square” and plan to leave filler room. For how those leftovers get used in a real cabinet list, the showroom and the layout guide are the next stop — this page’s job is to get the wall lengths honest.
Windows, Doors, and Trim: Measure the Whole Opening
Quick answer: For every window and door, record width and height including trim, plus the distance from each adjacent corner. Cabinets and hoods have to clear the trim, not just the glass or the slab.
A window that is “36 inches wide” in your memory may be 40 inches once you include the casings. Wall cabinets and a range hood care about that extra width. Measure:
- Width of the opening, outside of trim to outside of trim
- Height, from the sill or finished floor as you label it, to the top of the trim
- Distance from the left corner of the wall to the left edge of the trim
- Distance from the right edge of the trim to the right corner
- Sill height from the finished floor, if a window sits in a backsplash zone
Check the addition: left distance + trim width + right distance should equal the wall length. If it does not, a number is wrong. That one check prevents a surprising number of bad orders.
Door swing belongs on the sketch. A door that swings into the kitchen steals aisle space and can hit a pantry. You are not solving the aisle math on this page, but you must record the swing so the layout pass can use it.
Ceiling Height, Soffits, and Tall Cabinets
Quick answer: Measure ceiling height in several places, especially under soffits, beams, and in manufactured homes. One “96 inches” in the center of the room is not enough if a bulkhead drops over the refrigerator wall.
Tall pantries, over-refrigerator cabinets, and 42-inch wall cabinets all depend on a real ceiling number, not an average. Measure at each wall, at mid-span, and anywhere the ceiling changes plane. Write every number. If they vary by more than a small fraction of an inch, talk about that before you order stacked boxes.
Soffits — the boxed-down areas over many older Pahrump kitchens — are their own measurement. Record how far they drop from the true ceiling, how deep they come out from the wall, and where they start and stop along the run. A soffit can block a wall cabinet that “fits” the room’s main ceiling height.
If you cannot reach a soffit safely, photograph it with a tape on the wall below and flag “soffit not measured — confirm.” Do not invent a number to fill the box on a design form.
Plumbing, Gas, Outlets, and Vents
Quick answer: Mark every utility on the sketch with a distance from a corner and, where you can, a height from the floor. Sink bases and ranges have to land on something real unless you plan to move utilities.
Open the sink cabinet and note the drain and supply locations relative to the nearest corner. If a water softener or filter lives there, write that down — it steals storage and sometimes width. For a gas range, mark the valve. For an electric range, mark the receptacle. For a dishwasher, mark the water and drain path you can see.
Outlets and switches matter for backsplash height and for appliance garages. You do not need an electrician’s as-built drawing for a first cabinet sketch, but you should photograph the backsplash wall so nobody covers a switch with a wall cabinet.
Vents and returns are easy to miss. A return in a toe-kick or a vent on a wall can block a pantry. Measure their width, height, and distance from the corner.
If the remodel will move the sink or range, write “utilities will move” and treat today’s locations as temporary. The cabinet plan should follow the future utilities, and someone has to own that coordination — often the installer or general contractor, as discussed in the installation timeline and preparation guide.
Measure the Appliances, Not Only the Walls
Quick answer: Write the model number when you have it, plus width, depth, height, and door-swing notes. A 36-inch range and a 30-inch range are not interchangeable after the boxes are ordered.
Listed widths can be optimistic. Some refrigerators need extra space for door swing and for the handles to clear a pantry or a wall. Measure the machine you have, or get the specification sheet for the machine you will buy. Record:
- Width, depth, and height of the body
- Door swing and handle projection if you can
- Whether it is a bottom-freezer, side-by-side, or professional-style range
- Dishwasher width (usually 24 inches class, but confirm)
- Microwave location if it will be built in, over the range, or on a shelf
If you have not chosen appliances yet, say so clearly on the sketch. A first layout can leave labeled openings. A final cabinet list should not guess a refrigerator width. Hold the order until the openings are real, or accept the risk in writing.
Hoods and over-range microwaves have width and height rules of their own. Measure the window or cabinet space they must sit in, not only the cooktop width.
Want a Second Set of Eyes on Your Measurements?
Bring your sketch, wall photos, ceiling heights, and appliance sizes to the Carberry Square showroom. Staff can look over the numbers and help turn them into a cabinet list, as described in the benefits of a local Pahrump showroom. The showroom is at 4760 Pahrump Valley Blvd #4, Pahrump, NV 89048.
Measure Twice, Then Record the Leftover Inches
Quick answer: Repeat every critical wall on a different day. If the numbers match, you have a solid base. If they do not, measure a third time. Then add up each run and write the leftover inches that will become fillers or a size change.
Cabinet widths come in standard steps. A wall is rarely a perfect multiple of those steps. The leftover is not a mistake; it is a filler, a slightly different box, or a sign that the run needs a new split. Record the leftover on the sketch so it does not surprise you on a quote. How fillers show up on a bid is covered in how to compare wholesale cabinet quotes in Pahrump.
Write a simple addition for each wall: cabinet + cabinet + appliance + filler = wall length. If the sum is longer than the smaller wall measurement, the list is wrong. Catch it on paper.
Measuring Mistakes That Cause Reorders
Quick answer: The expensive mistakes are measuring only once, measuring over old counters and calling it the wall, forgetting trim, ignoring appliance door swing, and assuming the ceiling is one height.
One pass, one day
Tired eyes drop an inch. A second pass on another day is cheaper than a box that does not fit.
Measuring the old counter only
Backsplashes and end caps steal or add width. Note when a number is “over existing finishes.”
Forgetting trim and handles
Windows, doors, and refrigerator handles need clearance the raw opening does not show.
A single ceiling number
Soffits and manufactured-home variation hide in the corners. Measure more than mid-room.
Other frequent errors: mixing inches and centimeters; writing 11 feet 2 inches as 11.2 (that is not 11 feet 2 inches); and measuring aisles from cabinet faces instead of future counter edges — the last one is a layout issue, walked through in the layout guide, but it starts with knowing where the counter will sit.
Common mistakes when buying kitchen cabinets covers buying errors beyond the tape. This page stays on measurement.
Pahrump House Types That Change the Tape Work
Quick answer: Manufactured homes, older site-built houses with soffits, and open ranch plans all need a few extra measurements. The method is the same; the flags on the sketch change.
In many manufactured homes, ceiling height can vary, walls may be less conventional, and plumbing may come through the floor. Measure ceilings at several points and locate where wall cabinets can actually be anchored. Do not assume a site-built playbook.
Older site-built kitchens often have soffits, out-of-square corners, and floors that are not level. Measure walls at two heights and write the differences. A later article on the title sheet will go deeper on replacing cabinets in older Pahrump homes; this guide only flags the measuring extra work.
Open plans need a clear record of the doorway or cased opening into the living room, because an island or peninsula will be judged against that path later. Measure the opening width and the distance to the opposite counter. The go/no-go for an island is a layout decision, not a measuring trick.
Desert dust and hard water do not change how you hold a tape, but they do argue for photographing conditions now, before demo hides a stain or a bowed end panel you wanted to remember. Common cabinet problems in Pahrump homes can help you name wear you see while you measure.
Who Should Take the Final Measure
Quick answer: You can measure for a first layout. The person or company responsible if a box does not fit should confirm numbers before a final custom or tight order.
Showroom staff can review your sketch and point out missing fillers or a sink base that looks too tight, as described in the local-showroom benefits guide. That second look is a safety net, not a promise of fit, unless the written agreement says otherwise.
If an installer or contractor is part of the job, ask them to measure too and compare the two sets. Disagreements are useful. They mean somebody should go back to the wall. The Nevada State Contractors Board is the official place to check a contractor license if you hire one; this article does not invent license advice for the cabinet store.
Get the responsibility in writing on tight rooms and custom sizes. “Who measures the final walls, and who pays if a box does not fit?” is a better question than “Can you just take my sketch?”
How to Write the Numbers So Someone Else Can Use Them
Quick answer: Use one unit system, label every wall, show your addition, and keep photos with the sketch. A measurement nobody else can read is only useful to you, and only on that day.
Write the date on the sketch. If you revise a wall later, change the date and keep the old copy or strike through the old number. When a showroom or installer looks at two sketches with different lengths and no dates, they will not know which one to trust.
Stand in the room and read the sketch back: “This wall is 123 inches at the counter, 122 and 3/4 near the ceiling, window trim starts 28 inches from the left corner…” If you cannot narrate it, the page is not finished.
Email or print a set before you visit so you are not working from a phone in bright parking-lot light. Bring the original too. Paper still wins when you are pointing at a wall together.
What to Do With the Numbers After You Have Them
Quick answer: Use the measurements to start a layout, not to shop doors in a vacuum. Then take the sketch to the showroom or to the person who will draw the cabinet list.
The sequence is: measure, choose a kitchen shape that the room allows, pick cabinet lines that come in widths that can fill the walls, then confirm finishes. The Nye County 2026 buying guide and Shaker cabinet guide sit later in that sequence. Jumping to a finish first is how leftover inches get ignored.
If you need cabinets quickly, tell the designer which walls are firm and ask which in-stock widths can fill them. Lead time is a separate question, covered in how long it takes to order cabinets in Pahrump.
Bathroom vanities need their own tape work — different plumbing, different door swings. If you are measuring a bath on the same day, start a separate sketch. The vanity size and storage guide is the companion, not this kitchen checklist.
A One-Page Measuring Checklist
Quick answer: Walk the list in order and do not sign a cabinet order if an item is still blank without a flag.
- Sketch labeled, dated, and photographed
- Each wall: counter-height length, ceiling-height length, smaller number circled
- Each window and door: width, height, distances to corners, trim included, addition check
- Ceiling heights in several places; soffits measured or flagged
- Utilities marked with distances
- Appliance models or sizes, including door-swing notes
- Second-pass measurements recorded
- Leftover inches on each run written down
- Anything not reached safely flagged, not invented
If you want planning context for work zones after the tape work is done, use NKBA and other design resources as background through the National Kitchen & Bath Association, and put the room-specific layout work on the layout page rather than stretching this measuring article into a second layout guide.
A Worked Example: Walking One Hypothetical Wall
Quick answer: The numbers below are a teaching example, not a measurement from a real Pahrump job and not a quote. They show how the addition should look on your sketch.
Imagine a straight wall with a window near the center and a doorway on the right. You measure the wall at counter height and get 144 inches. Near the ceiling you get 143-3/4 inches. You circle 143-3/4 as the planning length and write “wall leans 1/4 inch.”
The window, including trim, is 42 inches wide. The left corner to the left trim is 40 inches. The right trim to the right corner, which includes a doorway, is 62 inches. Add 40 + 42 + 62 and you get 144, which matches the longer wall measurement, not the smaller one. That is a useful warning: the trim-to-corner pieces were taken at counter height. Recheck them near the ceiling or accept that fillers and scribe will have to absorb a quarter inch, and write that on the sketch instead of forcing the addition to look perfect.
You then list possible box widths that add to no more than 143-3/4, leaving room for a filler at one end. You do not invent a 36-inch sink base just because you like that size. You check whether the window, the sink, and the remaining space can live together. If they cannot, the box list changes. That is the point of the tape work: it stops a pretty list from being ordered into a short wall.
Repeat the same walk for every wall. The example is simple on purpose. Real rooms add a dishwasher, a range, or a refrigerator, and the addition gets longer. The habit does not change.
Finished Floors, Toe Kicks, and Counter Depth
Quick answer: Note whether you measured from the existing floor, a subfloor, or a future floor height, and record existing counter depth separately from wall length. Cabinet height and depth are easy to get wrong if the floor will change.
If new tile or a new slab will go in after you measure, the finished floor will be higher. That can shrink the space under a window sill or under a soffit, and it can change how a dishwasher sits. Write “measured from existing tile” or “measured from subfloor — finished floor not in yet.” Do not treat a subfloor height as the finished number.
Toe kicks are part of the cabinet, not a separate product you tape in isolation today, but you should still note any floor vents, transitions, or a raised hearth that will sit in the toe-kick zone. A vent you missed is a surprise on install day, as the installation guide explains in the preparation steps.
Existing counter depth is worth recording even if the counters are coming out. It tells you how far the current run stands off the wall, which is useful when you photograph appliances and door swings. New counters may be a different depth. Record the old depth as “existing,” not as a requirement, unless you have already chosen the new counter.
Standard cabinet depths exist, and many lines share a familiar base depth, but this page will not treat a catalog number as a promise for every line on the floor. Confirm depth on the sample or the spec sheet when you pick a line, then check appliance and aisle consequences in the layout guide rather than assuming a depth from memory.
A Photo Protocol That Saves a Return Trip
Quick answer: Photograph each wall straight on, then take close-ups of every opening, utility, soffit, and odd corner, with the tape in the frame when you can. Label the photos the same way you labeled the walls.
Wide shots show context. Close-ups show the outlet you forgot to draw. Both matter. After you take the photos, sit down and name the files or albums: “Wall A, left of window,” “Wall A, window trim,” “ceiling at fridge wall.” A camera roll full of unlabeled pictures is only slightly better than no pictures.
Shoot in daylight if you can, without standing in your own shadow on the wall. Avoid heavy filters. You want to read a trim edge, not a mood. If a backsplash is glossy, take a second shot from a slight angle so the tape numbers are still readable.
Include one photo that shows the whole kitchen from the main doorway. That shot helps a designer who was not in the room understand how the walls connect. Then walk the same clockwise path you used on the sketch so the photo order matches the paper.
If a photo and a written number disagree, believe neither until you measure again. The photo is evidence, not a substitute for the third pass.
Measuring a Kitchen You Still Cook In
Quick answer: You can measure a working kitchen. Move small appliances, open every base door, and do not skip a wall because a trash can or a stool is in the way.
Clear the counters on the wall you are measuring. A toaster and a cutting board are enough to hide a short return or a switch. Open the sink base so you can see plumbing. Pull the range out only if you can do it safely and without damaging the floor or the gas line — if you cannot, measure what you can from the front and flag “range not pulled.”
Refrigerator doors need room to open for a true swing note. If the current aisle is packed with a cart, move the cart for the thirty seconds it takes to swing the door and mark the arc on the sketch. You are still not deciding the future aisle width here; you are capturing the machine you have.
Plan the measuring session when you are not mid-meal prep. A tired, hurried pass is how a window stool height gets skipped. If you have to stop, stop at a wall boundary and date the incomplete sketch so you know what remains.
Corners, Standard Widths, and Why Leftovers Are Normal
Quick answer: Most cabinet lines are sold in a set of standard widths. Your wall almost never matches a perfect stack of those widths, so the leftover becomes a filler, a size change, or a different split. Record the leftover. Do not hide it.
Inside corners need extra care because two runs meet there. Measure both walls into the corner, and note whether a lazy-Susan, a blind corner, or two separate boxes might live there later. You do not have to choose the corner cabinet on measuring day, but you should not measure only one of the two walls and assume the other will work out.
Outside corners and peninsula ends need the return depth as well as the length. If a peninsula exists today, measure its length from the wall, its width, and the clear space around all three open sides. Whether a new island or peninsula is a good idea is a layout question; the tape’s job is to put real numbers under that question.
Framed and frameless lines can use width a little differently at a run’s end. That is a product question, covered in framed vs. frameless cabinets, not a reason to skip the wall length. Get the wall right first; then a designer can tell you how a given line will fill it.
If a leftover is very large, it may be a sign that a pantry, a tray cabinet, or a different appliance opening belongs on that wall. If a leftover is a sliver, it is probably a filler. Either way, the number has to be on the page before anyone talks about a quote, because fillers and size changes affect the list you will compare later.
Measuring for a Peninsula or an Island Site
Quick answer: Record the floor space, the nearby openings, and the distances to existing counters or walls. Do not declare an island a fit from a single mid-room number.
If you hope to add an island, measure the clear rectangle where you think it might sit: length and width of the open floor, then the distance from that rectangle to each surrounding counter edge, wall, and doorway. Measure in more than one place, because a room that looks rectangular often is not.
Also measure the path into the kitchen. A cased opening that is already tight will feel tighter if an island sits just inside it. Write the opening width and the distance from the opening to the first counter or wall. Hand those numbers to the layout step; this page will not apply clearance rules or call a room “big enough.”
For an existing peninsula, measure as if it were a short wall with three exposed sides. Include seated overhangs if people already sit there, and note whether you measured to the cabinet box or to the counter edge. Label which one you used.
Electrical under an island or peninsula, if you can see it, belongs on the sketch. If you cannot see it, write “island power not visible.” Do not assume a future island can be placed anywhere just because the floor looks empty.
Range, Hood, and Over-Range Microwave Measurements
Quick answer: Measure the cooktop or range width, the wall space above it, the window or cabinet clearance on both sides, and the height to the underside of any soffit or hood cabinet. A hood that fits the range may still fight a window.
Start with the appliance that will actually sit there, not a memory of a 30-inch or 36-inch class. Then measure the clear wall above it, including any window trim that crowds one side. Record the height from the cooking surface, or from the finished floor if you label it clearly, to the underside of the soffit or the proposed hood location.
If a microwave will sit over the range, the opening height and width have to match that unit’s specification, which you may not have yet. In that case, record the available opening and hold the product choice until the two can be compared. Ordering a cabinet housing first and a microwave second is a common way to paint yourself into a corner.
Vent paths — up through a soffit, out through an exterior wall — are a job for the installer or a licensed contractor, not something this measuring guide will design. Your job is to mark the exterior wall, the soffit, and any existing cap you can see from inside or, safely, from the ground outside.
When to Remeasure After Demolition
Quick answer: Remeasure after anything that changes a wall, a window, a floor height, or a soffit, and before a tight or custom order is treated as final.
Pre-demo numbers are good for planning. They are weaker as a last word once a backsplash is gone, a window is replaced, or a soffit is removed. Write a new date, measure the bare walls, and compare them to the first sketch. If a wall picked up or lost three-quarters of an inch, the filler plan changes.
If the job will keep the existing walls and only replace boxes, a careful first measure plus a confirming measure may be enough. If the job will move a sink, open a wall, or change the floor, schedule the confirming measure after those changes are real. The installation timeline is the place to think about the calendar; this page is the place to refuse an invented post-demo number.
Keep the old sketch. The comparison is the point. A single “new” number with no history makes it harder to see where a mistake crept in.
Fractions, Rounding, and How to Add Without Fooling Yourself
Quick answer: Pick 1/8-inch increments if you can, write fractions clearly, and add on paper or with a calculator that you then check by hand. Do not round a short wall up so the box list looks tidy.
If a measurement lands between marks, go to the smaller 1/8 you can honestly claim, or measure again. Rounding a short wall up is how a 24-inch box meets a 23-7/8-inch space. Rounding a long wall down is usually safer, as long as you still record the leftover honestly.
When you add 24 + 36 + 18 + a filler, write the filler as a number, not as “a little bit.” “A little bit” cannot be checked. If the filler is 2-1/4 inches, write 2-1/4. If you do not know yet, write “leftover 2-1/4 — filler or size change TBD.”
Watch unit traps. 10.5 feet is 126 inches. 10 feet 5 inches is 125 inches. Those are not the same. If anyone on the project prefers feet and inches, convert to inches on the official sketch and keep the original in a margin if you must.
What a Showroom Review Usually Asks For
Quick answer: Expect questions about the smaller wall lengths, appliance models, ceiling changes, and anything you flagged instead of measuring. Arrive with those answers on paper.
A useful review is a conversation about missing inches, not a debate about door style. If a sink window and a dishwasher cannot both sit where you hoped, the measurements should make that obvious. Bring the photos so you can point at the wall instead of describing it from memory.
You may be asked whether utilities will move, whether the floor will change, and who will install. Those are fair questions because they change whether your first numbers can be trusted as final. Honest “I don’t know yet” is better than a guess. The Nye County buying guide can help you sequence those decisions after the tape work is solid.
If you want to look at door samples the same day, do that after the numbers have been walked. Samples are easier to enjoy when you are not still missing a refrigerator width.
What This Guide Will Not Ask You to Do Yourself
Quick answer: Do not cut into walls, disconnect gas, or pull heavy appliances if you cannot do it safely. Flag those items for a qualified person.
Measuring is mostly a tape, a pencil, and a camera. It is not demolition, and it is not electrical or gas work. If a measurement would require lifting a built-in refrigerator or opening a wall cavity, write what you could see and stop.
Structural questions — whether a soffit can come down, whether a wall is load-bearing — are outside this article. Do not treat a cabinet measuring guide as permission to alter the house. Get the right person for that work, then remasure after the structure is known.
Material quality, plywood versus other cores, and finish performance are also outside the tape. Once the room is measured, cabinet materials explained and quality checks can help with those later questions.
Building a Second-Pass Habit You Will Actually Keep
Quick answer: Schedule the second measure like an appointment, use the first sketch as a checklist, and only change a number when the tape disagrees, not when you wish the wall were longer.
The second pass works when it is slightly boring. Walk the same clockwise path. Read the old number out loud, measure, and confirm or correct. If you start redesigning the kitchen during the second pass, you will skip a wall. Keep a separate note for design ideas and leave the sketch for numbers.
If a helper can hold the tape, use them, but you should still be the person who writes. Two people shouting numbers across a room is how 68 becomes 86. One writer, one reader, then switch roles on a third pass if a number still will not settle.
When you are done, photograph the finished sketch itself. That picture is a backup if the paper is left in a truck or a bag. Put the date in the photo.
Local Conditions That Show Up While You Measure
Quick answer: You may see faded finishes, hard-water staining at a sink base, or dusty top edges. Record them as conditions, not as measurements, and keep them off the dimension lines so the sketch stays readable.
Pahrump’s desert climate and hard water show up in kitchens that have been in place for years. While you have doors open, look at sink-base floors, hinge tightness, and whether an end panel has bowed. Those notes help you plan replacements; they do not replace a wall length. Put them in a margin labeled “conditions.”
If a floor slopes noticeably, measure cabinet-height clearance at both ends of a run and write the difference. A slope is a condition the installer will have to deal with, and it is better on the page than as a surprise.
Sliding glass doors and bright west-facing windows are common in local houses. Measure their trim carefully and photograph glare walls so a designer can see how close a tall pantry would sit to the glass. Again, whether that pantry is a good idea is a layout call; the tape only shows the inches.
Measuring With a Helper, and Measuring Alone
Quick answer: A helper is useful on long walls and at the ceiling, but one person should still own the written record. If you are alone, use the tape lock, a laser check, or shorter segments you can add.
Two people can finish a kitchen faster, and a taut tape is more accurate than a sagging one. Agree on a method before you start: who holds the hook, who reads, who writes, and what “ready” means. If the reader calls a number while the writer is still finishing a window, the wall will get the window’s figure.
When you are alone, do not stretch a 16-foot wall with a floppy tape and a guess at the mid-span. Break the wall at a window, a doorway, or a pencil mark you can see. Measure each piece, add them, then, if you have a laser, check the total. If the two methods disagree by more than a small fraction, do it again. A disagreement is information.
Children and pets should be out of the walking path while a tape is on the floor or a ladder is in use. A measuring session is short. It is not worth a trip or a torn sketch.
If a helper is a spouse or a contractor who already has opinions about the layout, park those opinions until the numbers are done. You can argue about an island later, with distances in hand, using the layout guide. During the measure, the only debate should be whether a reading was 86 or 68.
Extra Care in a Small or Galley Kitchen
Quick answer: Small rooms punish small errors. Measure both long walls, both ends, and the clear width between finished faces, and be honest about door swings that already bump each other.
In a galley, the distance between the two runs matters as much as each wall’s length. Measure that clear width at both ends and in the middle, at counter height if counters exist, and write whether you measured to cabinet faces, counter edges, or walls. Label it. A future layout will convert those numbers; this page only captures them.
End walls in a small kitchen are easy to treat as leftovers. Measure them anyway. A short end may be the only place a 24-inch pantry can go, or it may be too short and force a different storage plan, such as the ideas in small-kitchen cabinet storage.
Door swings overlap more often in tight rooms. Open the refrigerator, the range, and the entry door, not all at once if that is unsafe, but in turn, and mark where they cross. You are documenting conflicts, not solving them yet.
Because leftovers are smaller, a half-inch error is a larger share of the wall. The second pass is not optional in a compact kitchen. Neither is the addition check on every window wall.
Handing the Sketch to Someone Else
Quick answer: Send a dated sketch, the photo set, and a short note about flags and unknowns. Ask the other person to repeat any number they will rely on.
A sketch that made sense in your kitchen can confuse a designer who has never stood in the room. That is why labels, a doorway name, and a whole-room photo matter. When you contact the store or walk into the showroom, lead with the flags: “ceiling not measured over the fridge,” “range not pulled,” “floor will change.” Those sentences prevent a tidy list based on a hidden gap.
If two people measured, include both sets or the agreed set plus the disagreements. Hidden disagreement is worse than a visible one. A visible one gets a third measure.
Ask how the sketch will be used. A first layout, as described in local showroom benefits, has a different standard than a final custom order. Knowing the use tells you how urgent a confirming site measure is.
Keep a copy. Once a paper leaves your hand, you still need the original if a number is questioned a week later.
The Day You Sit Down With the Cabinet List
Quick answer: Before you accept a list, add the boxes on each wall and compare the total to your smaller wall length. If the list is longer than the wall, stop.
This is the last measuring job, even though it happens at a table. A cabinet list is a set of widths. Your sketch is the test. Work one wall at a time. Include appliances and fillers. Use the smaller wall number. If the list only works on the longer of your two wall measurements, it does not work.
Check that window and hood clearances still make sense with the boxes on the list. A sink base can be correct in width and still sit too far under a window if the list shifted everything left. The sketch’s distances-to-corners are how you catch that.
If you cannot add the list because it is incomplete or hard to read, ask for a clearer wall-by-wall breakdown. You are not being difficult. You are finishing the job the tape started. Style samples can wait until the addition works.
If the list is shorter than the wall, that is not automatically a problem — it may mean a filler, a tray cabinet, or an open space was left off the written list. Ask where those leftover inches went. Silence on a leftover is the same risk as a list that overruns the wall: something is not on the page.
Bring the same dated sketch you used at the start, not a rewritten version that quietly adopted the list’s widths. The original numbers are the audit. A cleaned-up sketch that already matches the list cannot catch an error, because the error has been copied into the “source.”
Pahrump Wholesale Kitchen and Bathroom Cabinets
Pahrump Wholesale Kitchen and Bathroom Cabinets serves homeowners, builders, remodelers, and rental owners in Pahrump and around Nye County from its showroom in Carberry Square. Bring a sketch, wall photos, and appliance sizes if you want help turning measurements into a cabinet plan.
- Address: 4760 Pahrump Valley Blvd #4, Pahrump, NV 89048
- Phone: (702) 678-5154
- Email: info@pahrumpwholesalekitchenandbathroomcabinets.com
- Showroom: Pahrump kitchen cabinets showroom
- About: About the store
- Contact: Contact us
- Maps: Google Maps listing
Frequently Asked Questions About Measuring a Kitchen for New Cabinets in Pahrump
How do I measure my kitchen for new cabinets in Pahrump, NV?
Sketch the room, then measure each wall corner to corner at about counter height and again near the ceiling, and use the smaller number. Record windows and doors including trim, mark utilities, measure ceiling height in several spots, and write appliance sizes. Photograph each wall and measure a second time on another day.
What tools do I need to measure a kitchen?
A 25-foot tape measure, a pencil, paper or a grid, and a phone camera are enough for most rooms. A laser measure and a level help but are not required. Work in inches, and do not climb unsafely to reach a soffit — flag what you could not reach.
Should I measure over my old cabinets and counters?
Measure to the wall when you can. If you can only measure over existing counters or backsplashes, write that down and plan to confirm after those finishes come out. Old end caps and backsplash returns can change the true wall length.
Why measure a wall at two heights?
Walls lean and corners are not always square. A run that fits at the ceiling may be tight at the counter, or the other way around. Plan with the smaller length and note the difference so fillers or scribe can be discussed.
How do I measure windows and doors for cabinets?
Measure width and height including trim, plus the distance from each adjacent corner to the trim. Add those pieces and check them against the wall length. Cabinets and hoods have to clear the trim, not only the glass or the door slab.
Do I need professional measurements before I visit a showroom?
Not always for a first layout. A careful homeowner sketch is usually enough to start. For a final order, especially with custom sizes or a tight room, the party responsible for fit should confirm the numbers on site.
What appliance information should I record?
Model numbers when you have them, plus width, depth, height, and door-swing or handle notes. A refrigerator or range that is even a little wider than the opening will not fit after the boxes arrive. If you have not chosen appliances yet, say so and hold the final list.
How precise do the numbers need to be?
Work to the nearest 1/8 inch if you can, and be consistent. More important than false precision is repeating the measure and catching a full-inch error. Leftover fractions often become fillers; a missed inch can become a reorder.
What if my ceiling height changes under a soffit?
Measure the main ceiling and the soffit separately: how far it drops, how deep it comes out, and where it starts and stops. Tall cabinets that fit the main ceiling may not fit under the soffit.
Can I measure in feet instead of inches?
You can, but convert everything to inches on the sketch you will hand to a designer, and do not mix 11.2 feet with 11 feet 2 inches. Inches prevent that confusion.
What should I bring to the Pahrump showroom?
The dated sketch, photos of each wall, ceiling heights, utility notes, and appliance sizes or model numbers. A second copy on paper helps. The showroom can review the numbers and help turn them into a cabinet list.
Does this guide also cover bathroom vanities?
The method is similar, but a vanity needs its own sketch because plumbing and door swings differ. Use a separate page for the bath and see the vanity size and storage guide for layout context.
What if I am mid-remodel and the walls will change?
Measure what is there, label numbers that will change, and plan a confirming measure after drywall or after a window move. Do not order tight or custom boxes from pre-demo numbers alone.
Who pays if a cabinet does not fit?
That depends on the written agreement and on who owned the final measure. Ask before you sign, especially on custom sizes. A reviewed sketch is a help, not automatically a guarantee of fit.
Where is Pahrump Wholesale Kitchen and Bathroom Cabinets located?
Pahrump Wholesale Kitchen and Bathroom Cabinets is at 4760 Pahrump Valley Blvd #4, Pahrump, NV 89048. Phone (702) 678-5154. Email info@pahrumpwholesalekitchenandbathroomcabinets.com. The showroom is in Carberry Square and serves Pahrump and nearby Nye County. Maps: Google listing CID 12186352681158624154.
Find Pahrump Wholesale Kitchen and Bathroom Cabinets
Open the Google Maps listing · 4760 Pahrump Valley Blvd #4, Pahrump, NV 89048 · (702) 678-5154
Measure First, Then Choose the Cabinets
A kitchen that fits starts with honest numbers: walls at two heights, openings with trim, ceilings in more than one spot, utilities, and real appliance sizes. Measure twice, write the leftovers, and do not invent a height you could not reach safely. Call Pahrump Wholesale Kitchen and Bathroom Cabinets at (702) 678-5154 and bring your sketch and photos to the Carberry Square showroom.
Pahrump Wholesale Kitchen and Bathroom Cabinets · 4760 Pahrump Valley Blvd #4, Pahrump, NV 89048 · (702) 678-5154
One Response